


The Winter Coat - Part 3
This post should probably be two, but I plan to post final photos tomorrow in time for the #sewfrosting challenge hosted by True Bias and Closet Case Patterns so this post is the catch all for putting the coat together. Additionally this post may glaze over some aspects because the innumerable hours I spent making this coat is still fresh in my mind and the idea of revisiting it all now makes me want another coffee, a nap, and maybe a short cry. However I did post a lot of my steps in my instagram stories and can be referenced there for the time being.
To start, as I had decided to do couture finishings I started going through the absolutely amazing book ‘Revised & Updated: Couture Sewing Techniques"‘ by Clair B. Shaeffer. This book is extremely dense with information, and took several reads through some of the techniques to fully understand them, but it did lead to me feeling 100% confident in the coat I made.

One of the new techniques I learned about and used was working with horsehair canvas to interface and stabilize my coat. For those who haven’t used it before, horsehair canvas is a fabric that has super corse fibers that are woven into a pliable open weave. It isn’t fused to your garment either; instead you hand sew your garment pieces to the canvas in evenly spaced rows carefully joining the two materials with loose basting stitches. These stitches have to be done carefully, as you only pick up a few fibers from your main fabric to avoid showing any of your stitches on the right side of your garment.

For the collar and lapels however you ‘padstitch’ the pieces. Padstitching uses the same technique of carefully basting horsehair canvas to your main fabric to stabilize them, but instead of spaced rows you sew the two pieces together in densely packed shorter stitches. This creates a stiffer/firmer fabric piece which is exactly what you want for your collar/lapels.
Now, all this hand stitching of the interfacing to the garment meant that a ridiculous amount of effort and time went into something that is 100% non visible. Well worth it, but OH MY GOODNESS, all that work and all those even stitches just to hide it away has been a little heartbreaking.

After I had everything interfaced with horsehair I basted my seams together to test fit. Per usual I had given myself a good +0.5” seam allowance because I’m always worried about my clothing coming out too small. It’s always possible to take something in, but there is no pretty way to attach more fabric if you cut 0.25” too narrow. However, the first thing I noticed when I put on the coat was that it swamped me. I meant for the coat to have room for a sweater underneath and I still hadn’t attached the lining, but it was somewhat ridiculous. I took out a good half inch across the back and quarter inch from the inner arm panels.
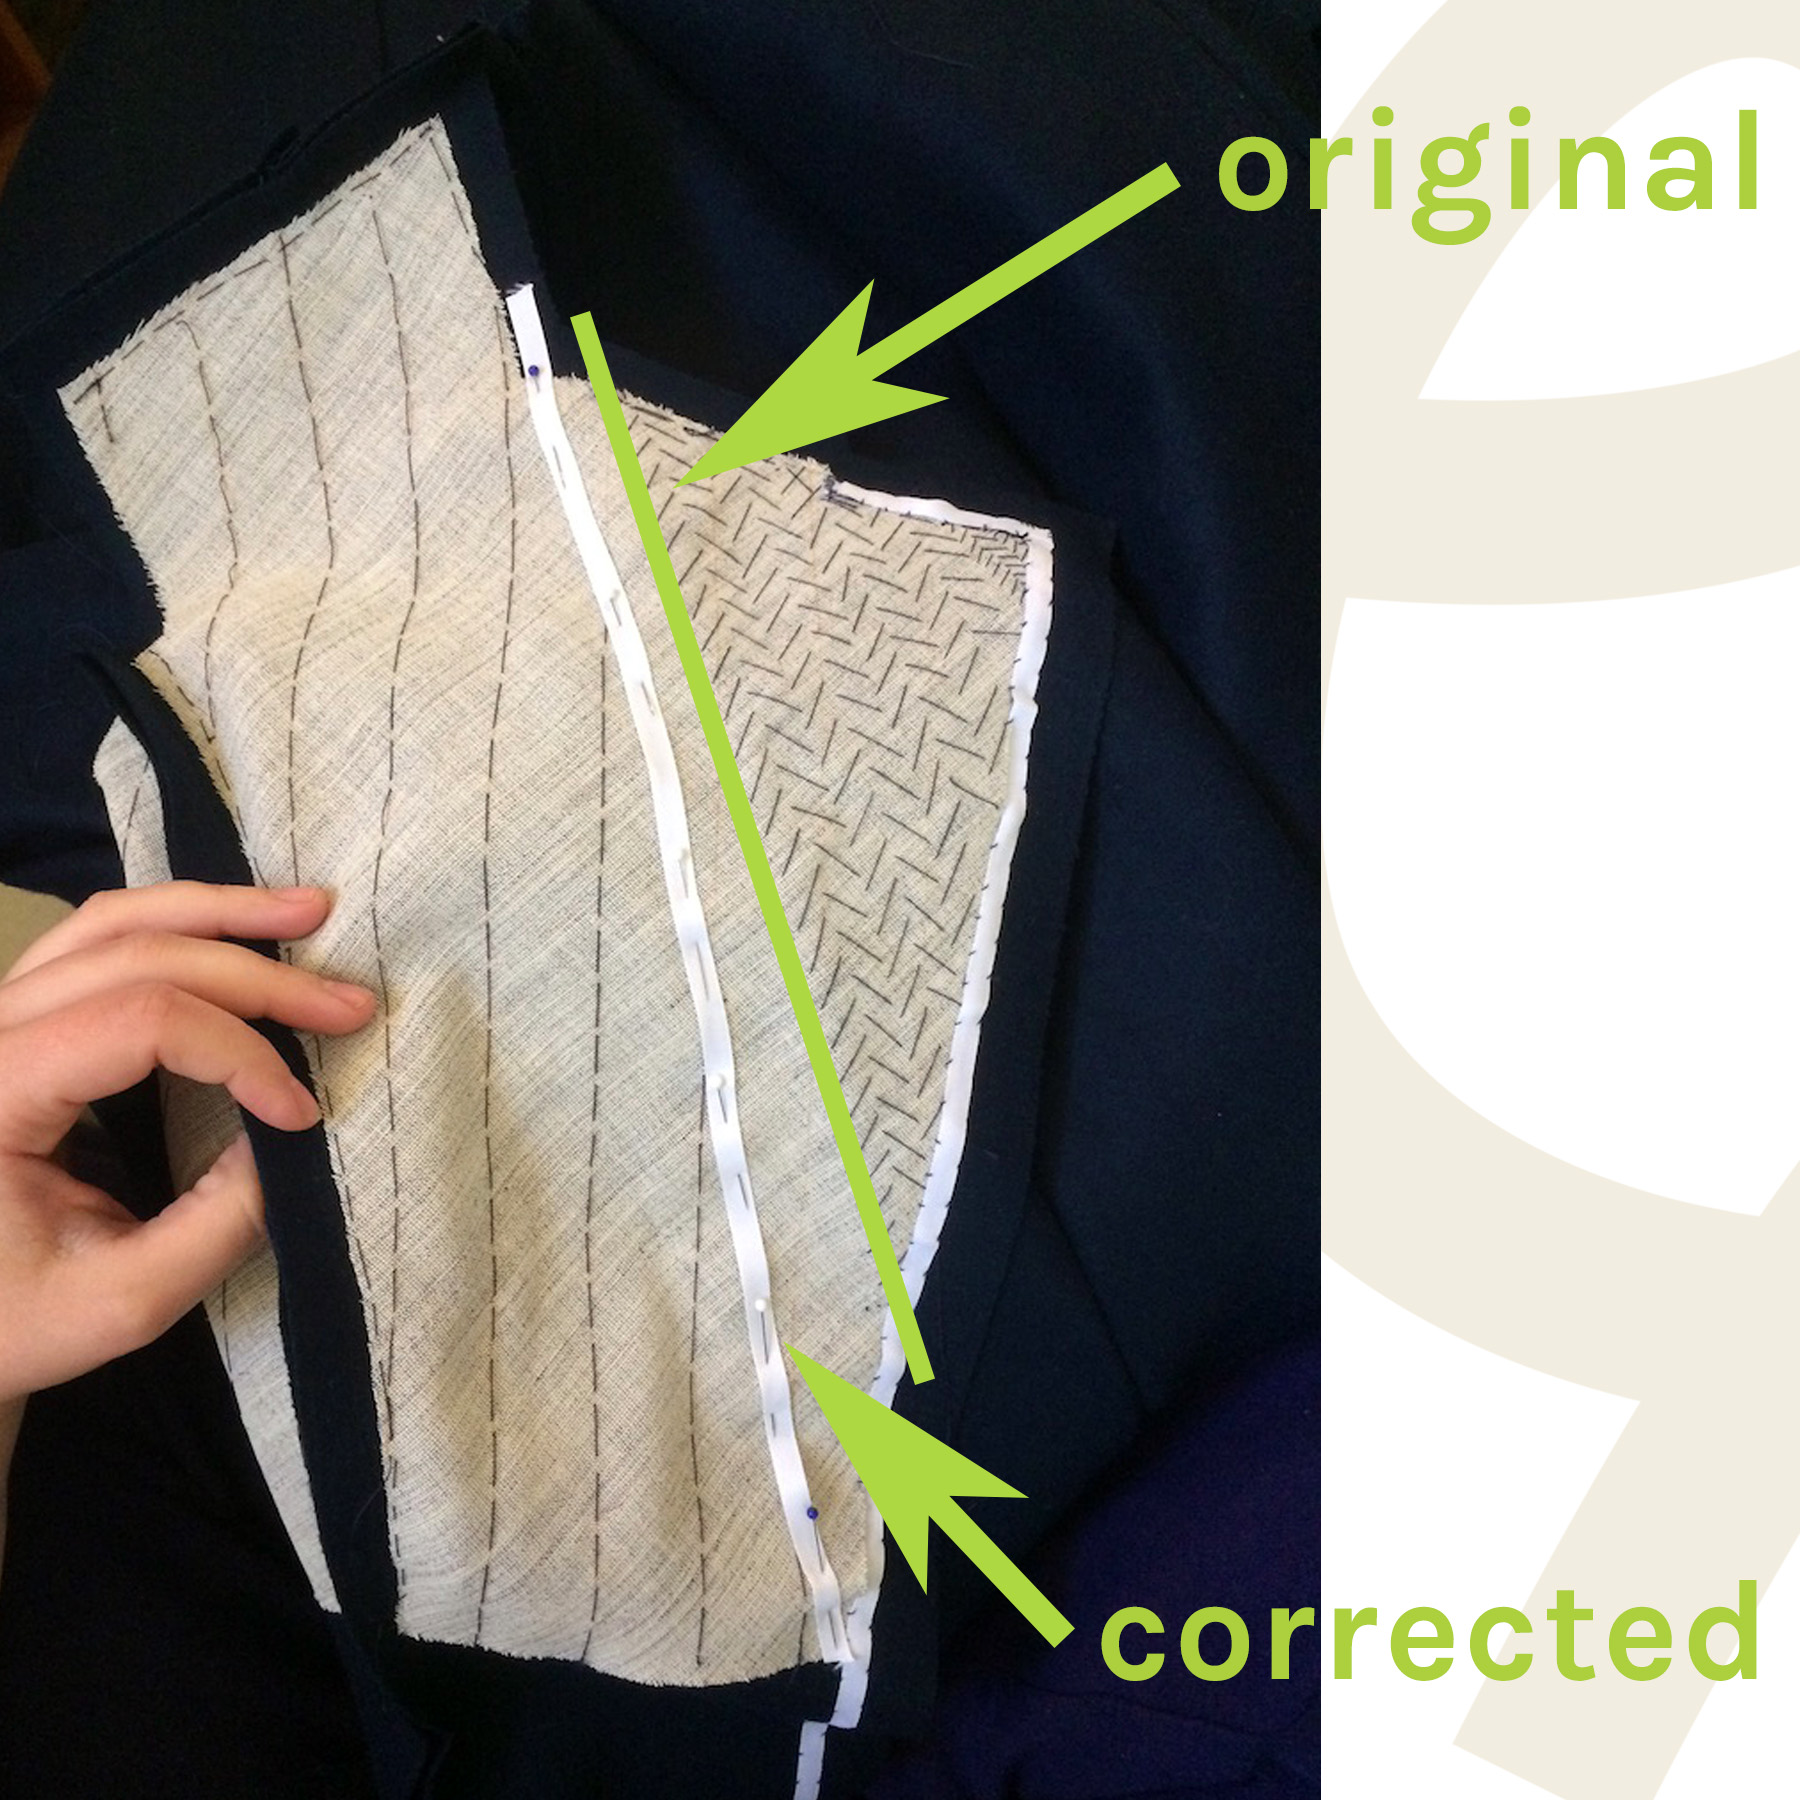
I also realized that my initial lapel size was piteously small. This of course meant taking out all my previous padstitching and the bridle (narrow ribbon that is sewn on the fold line of your lapel to stop it from stretching over time) and re-attaching them lower. As much as redoing all that work sounds completely exhausting — just wait for my even bigger re-do further down the post.
Once the lapels were fixed I was looking at a very fancy long vest, so next up was attaching the sleeves permanently with the addition of some lovely sleeveheads (which was my first time using them). A sleevehead is like a tiny booster for the top shoulder seam of your sleeve. It makes your sleeve cap maintain it’s shape and prevents the droopy slouchy shoulder look; which is something I desperately need in my coats because I have very sloped shoulders. I ended up attaching the sleeves in twice because the first time in the sleevehead took up more space that I imagined and created a terrible drag from armpit to wrist.
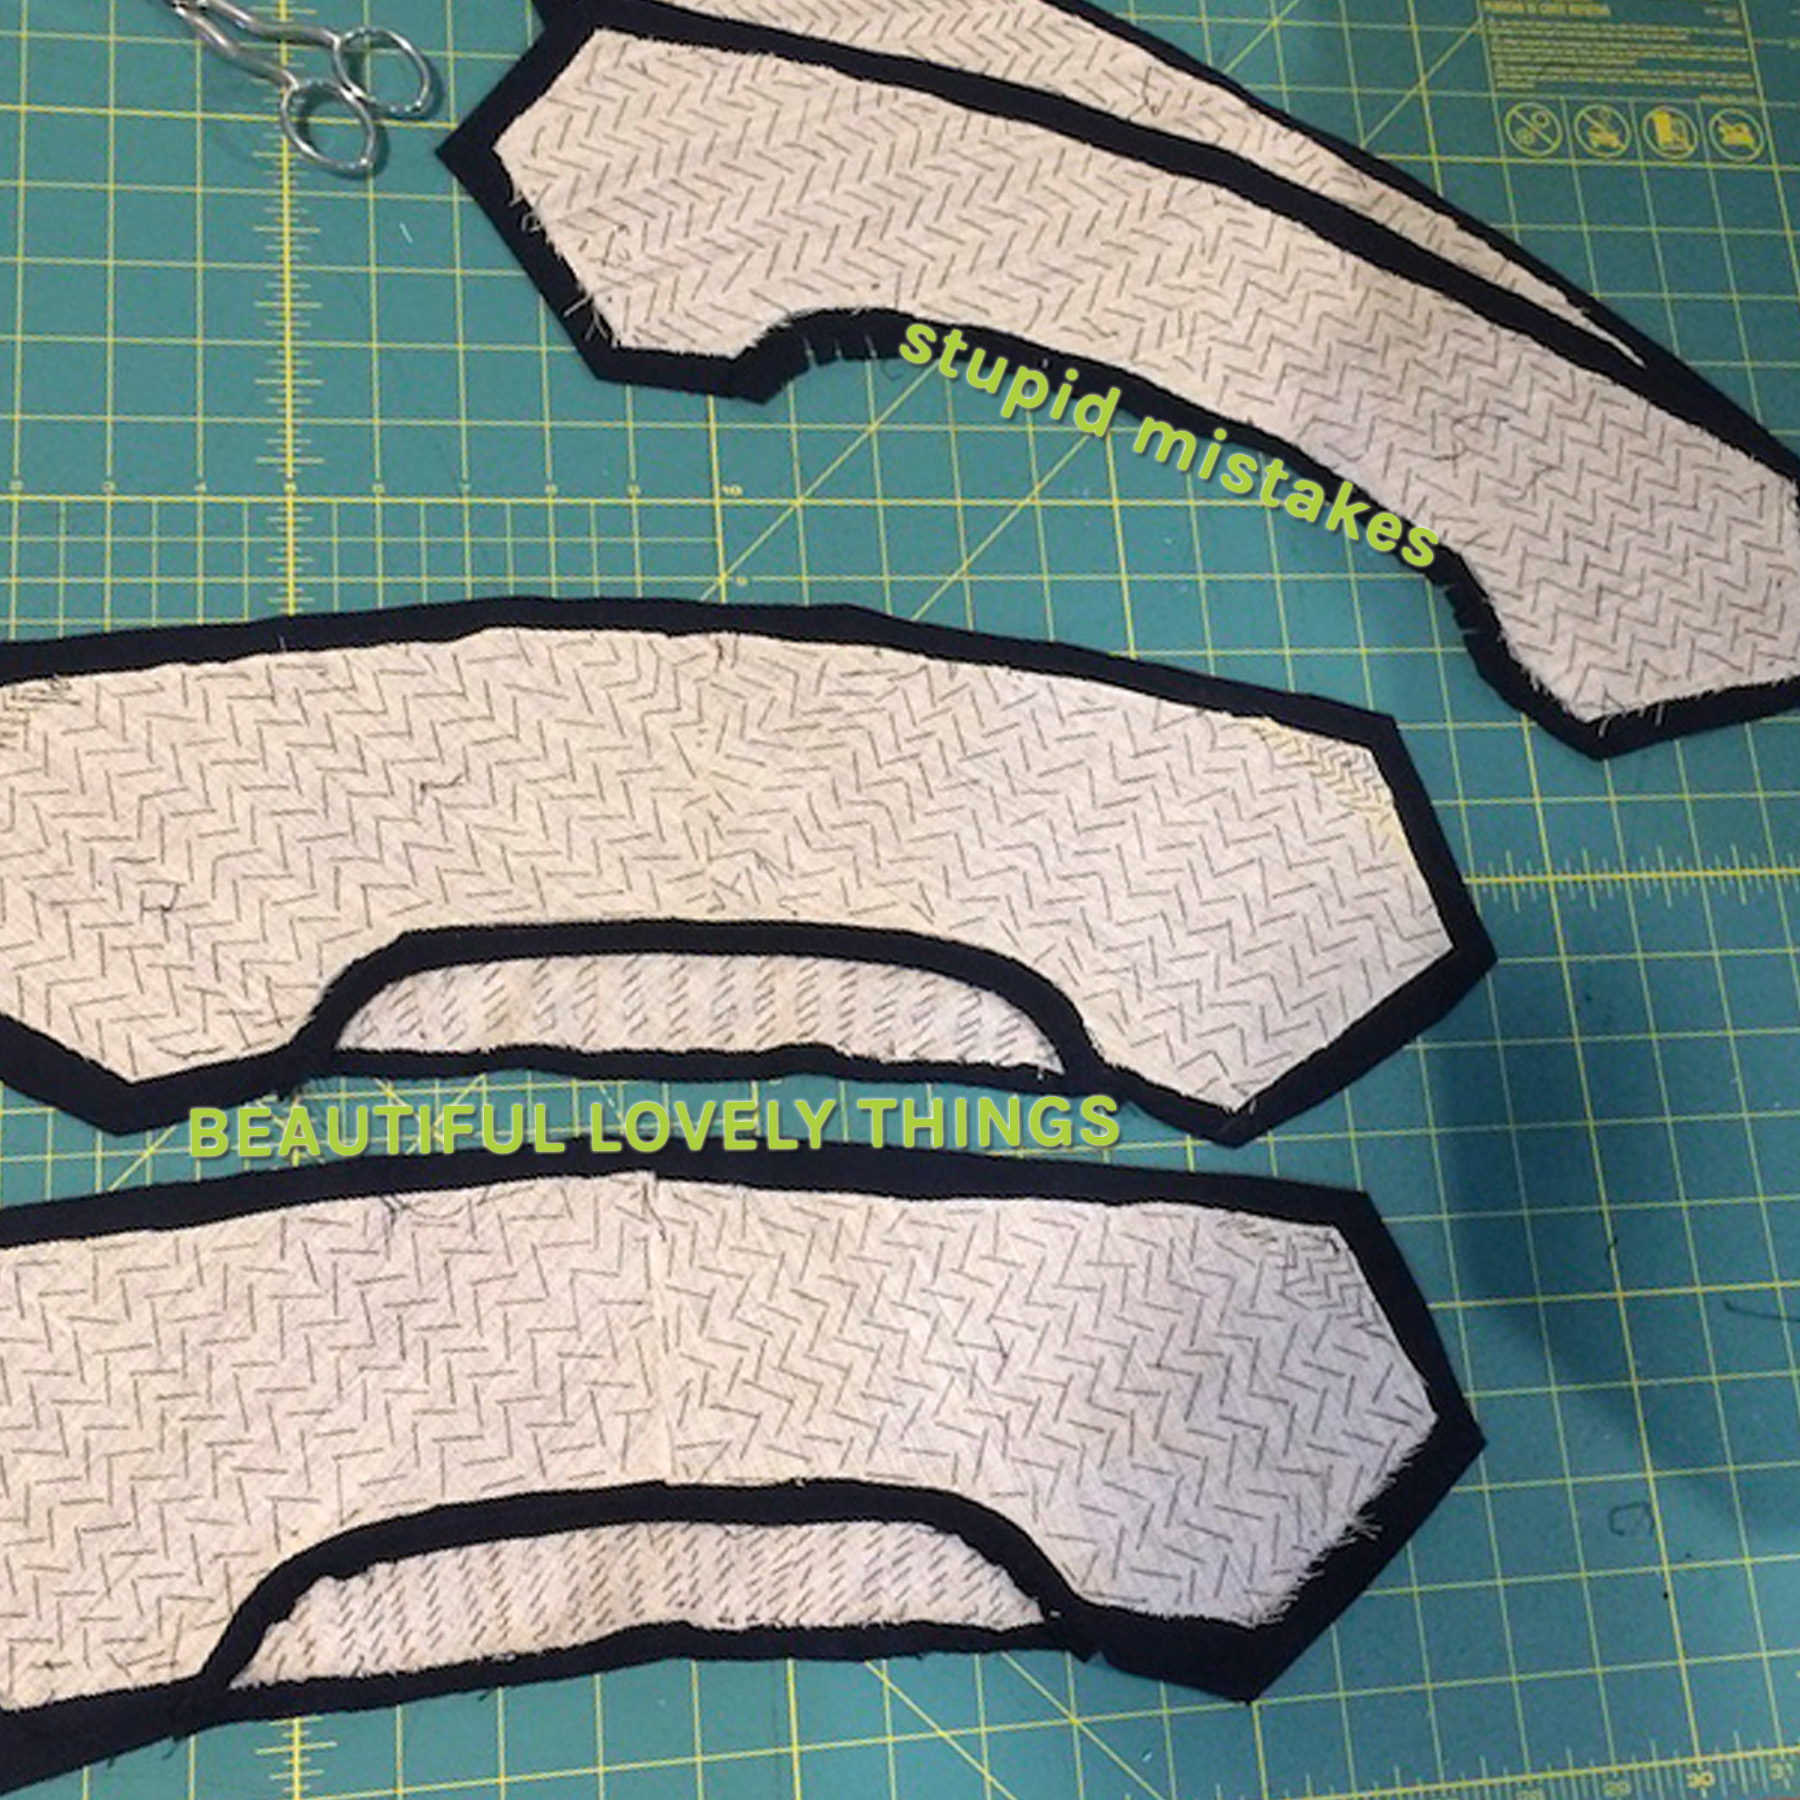
Following the sleeves going in it was collar time, and this my friends was the real “oh crap” moment. It took me very little time once I started trying to attach my under collar to the collar stand to realize that I had cut the collar piece too wide. A quick check showed me that I had also made the same mistake with my upper collar.
YUP.
Both upper and under collar were too wide to fit around the collar stand which meant that I had to cut two new collar pieces, padstitch the entire thing, and come to terms with the fact that I was using the last of the fabric I had managed to hold back with the intent to make it into a belt/tie.
“But wait,” you might say. “Can’t you just go back to the lovely shop where you had bought the fabric from and pick up the extra yardage needed??” Well as it turns out no, because when I went back to Pendelton Woolen Mills they were COMPLETELY sold out of my lovely navy blue wool. While they did have plenty navy blue Melton wool they were totally sold out of the EcoWise and the dye lots were very different.
Obviously a matching collar was more important, but it meant I had to re-think how the coat was going to close. I debated for a while making a contrasting color belt for the coat, but I couldn’t bring myself to do it. The coat was looking so sleek and lovely that I didn’t want to break it up with something that may just end up looking like a cheap after thought. I may change my mind about that, but for the moment the coat will continue no belt.
Instead I satisfied myself with a hook. I had a sturdy dark iron metal hook from a previous project that I set into the front facing, and then made a small fabric eye that I attached as unobtrusively as I could to the outer edge of the opposing front facing. I briefly considered a button closure, but I couldn’t bring myself to put a button hole in my perfect coat. This is partly because I am still am envisioning making a tie in the future for this coat, but also because I had kept my front facing pieces wide enough to close over one another and to set a button as far to the side as I’d need to would look silly.

Lastly I made my lining, and continuing on this honesty train I took a grand total of 2 process pictures of my lining. For those who haven’t worked with incredibly slippery fabrics before, let me just say they are tricky stupid things. Yes, they look and feel incredibly gorgeous once they are finished but for the effort involved…. well damnit, they are worth it! But it’s also terribly exhausting. I could see myself having taken an extra 3 hours cutting my fabric and still not have been 100% pleased with how it turned out. In my search for lining I ended up finding this truly glorious thick supple light almost ice blue rayon crepe de chine that had a really nice heavy weight to it. I knew the fabric would help make a much warmer and swishier coat and the light blue seemed like a wonderful bright light inside such a large dark coat. Of course the nature of the fabric meant that it moved around with every light touch and even though I thought the weight of it would help keep it in place — it really just meant that when one bit slid it took the rest of the fabric with it.
However despite the challenges my lining was cut and sewn pretty quickly — and even got an addition of two welt pockets (one on each side)! Because let’s face it; everything is better with more pockets. Also inside pockets are something that every good winter coat needs because weathery things happen to outside pockets.
Once the lining was sewn I attached it to the coat with the bagging method, which left the bottom hem to be turned up and pressed to my desired height and finished by hand. I am really happy I left as much length at the bottom hem as I did because on my coats I love a really deep bottom hem. While the Rumana coat technically only allows for a roughly 1” hem I prefer mine closer to 2” (or more) which I was able to do. The additional length helps keep the hem weighed down and the depth prevents rain/mud that is kicked up by your shoes from getting on your nice silky lining.
Now I know this post is incredibly long and the final parts aren’t too detailed, but I’m hoping it gives everyone an idea of what I went through with this coat. Plus I’ll have a gorgeous post tomorrow with all the final photos I took where you will be able to see the wonderful finished project along with another two pieces I put together last minute to make a really truly frosted outfit.
Stay tuned!

